Photographing your paintings with a phone – a very simple guide
Photographing your paintings can be a challenge if you worry about getting it wrong. With more exhibitions going online, getting a sharp image of your painting has become a key factor in getting sales.
But it doesn’t have to be daunting or expensive if you have a reasonably up to date phone. Having your work professionally photographed in a studio with all the whizzy equipment, and an expert finger on the button is the dream. But that’s beyond the budget of most artists.
Exhibitions aside, it is important to have good images of your paintings. These days, most galleries expect the artist to do some proportion of the publicity for their shows. Many artists don’t have gallery representation, but do all their own marketing on social media. No matter how many social media platforms you are on, without high-quality images, your work just won’t shine as brightly as it should.
Having a top-notch photograph of all your work is worthwhile just for your own records as well. You might need a good picture of a painting that has already been sold (or already been framed).
Many artists think that, even if they can’t afford a professional photographer, they need to buy a load of pricey kit. But, if you follow a few simple rules, you can get a good result with your phone camera.
I use an iphone and have written this with that in mind. However, I am sure other brands of smart phone have equivalent functions.
Steps for photographing your paintings with a phone
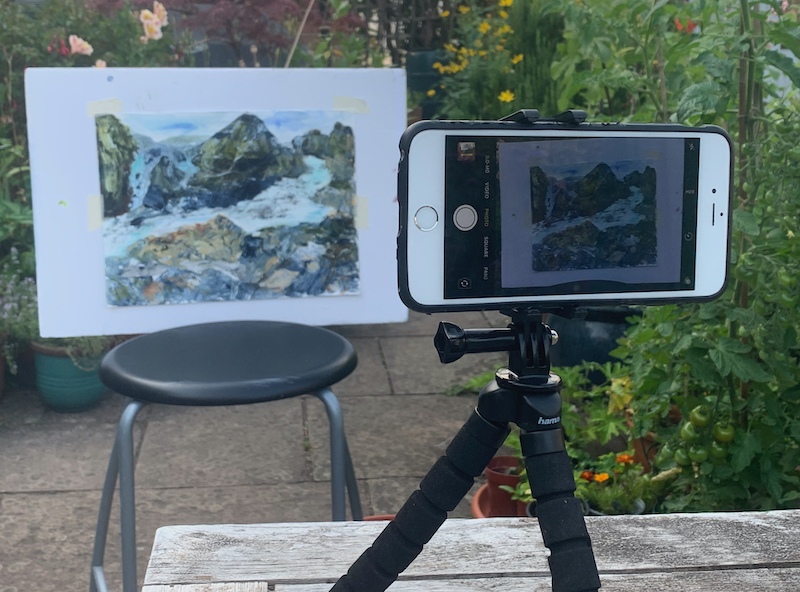
Lighting your painting
The simplest way to get good lighting is to take your photograph in daylight. Electric lights will create a colour cast on your painting which won’t be its true colour. The colours will be washed out by direct sunlight as it is likely to be too harsh. So, here’s what to do:
- Take your photograph outdoors in the shade or on an overcast day. Make sure your painting is standing directly upright – not at an angle. Either hang it on a wall, put it on an easel or find a stool or chair you can stand it on.
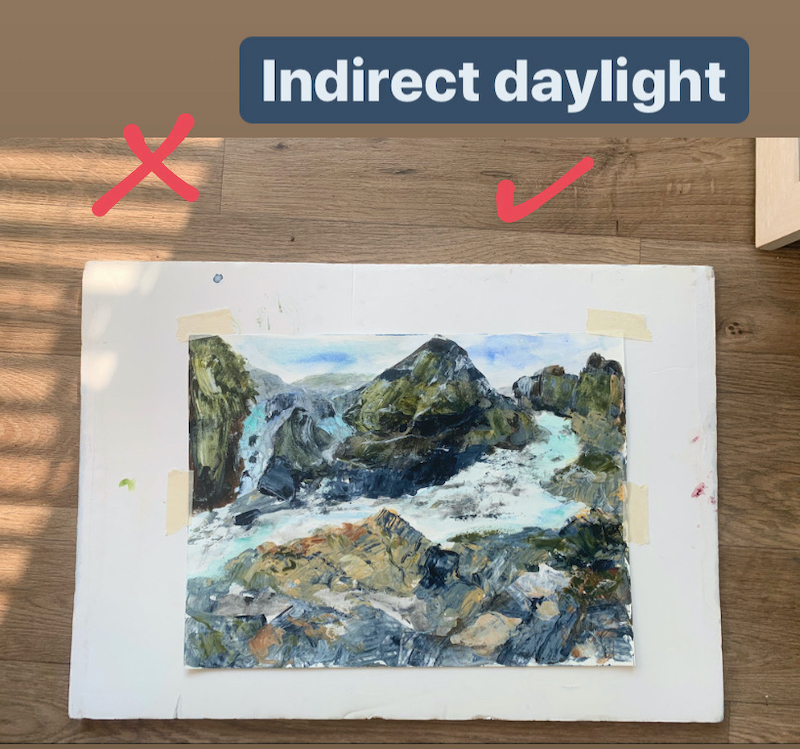
- Place your painting on the floor in the doorway where it will pick up natural light – but not where the sun is shining directly on the floor
Reflections
Take the photograph of the unframed painting if it will be placed behind glass in the frame. You won’t be able to fully remove any glare or reflections once the photograph has been taken. If your painting has a gloss varnish, you will have to make sure that the painting is not in direct light when you photograph it.
Alignment
If you are taking your photograph outdoors, it is best to put it on an easel or hang it on a wall. Tape your painting to a board if it is on paper. Some small pieces of low-tack masking tape carefully placed on the corners and sides will hold the painting securely for long enough to take your photograph. Take extra care not to damage the substrate when you remove the tape.
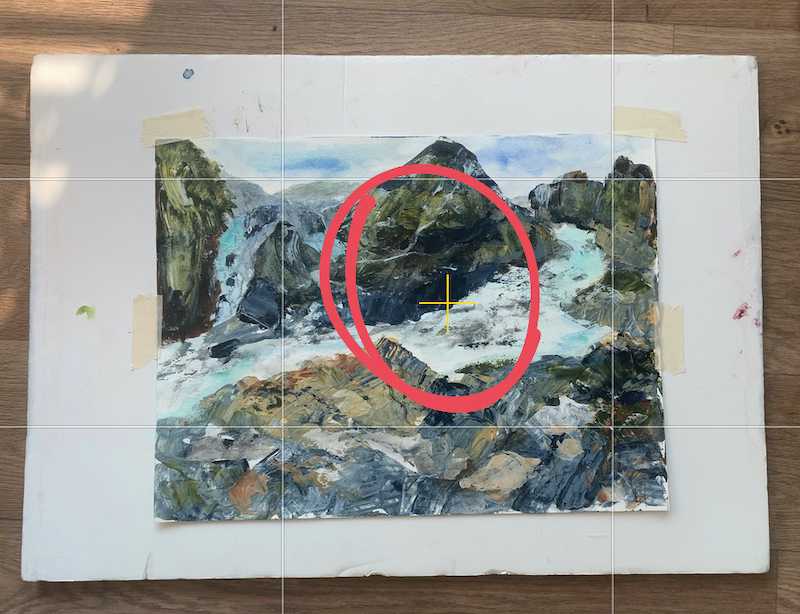
Make sure the two crosses in the middle of your screen are aligned if you have laid your painting on the floor to be photographed. That will tell you that your camera is aligned correctly to get your painting photographed squarely.
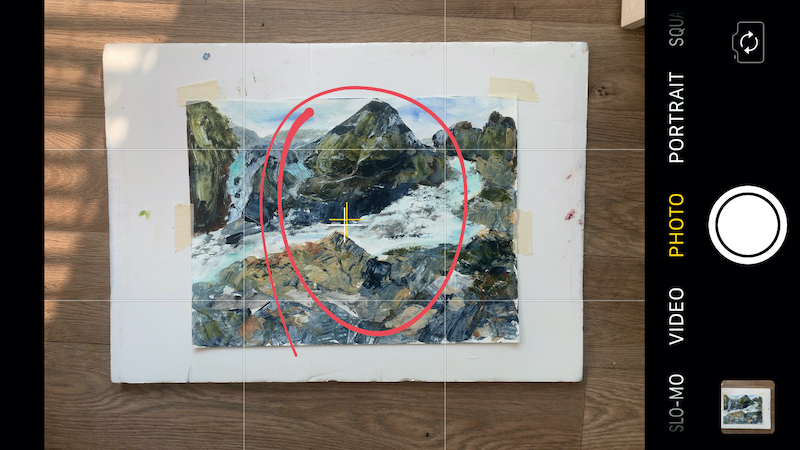
When photographing your paintings, get close enough so that your painting fills as much of the frame as possible. The bigger it is in the frame, the bigger the image you will end up with.
You will find it very difficult, if not impossible, to correct the alignment of the painting in the photograph by manipulating the image afterwards.
Final tweaks
Check the photographs on your computer before putting everything away. Make sure the colour is correct, the photograph is clear and crisp and the painting is square. You can make a few adjustments in the photo software on your phone or computer.
Things you may need to adjust after photographing your paintings:
- Colour may need to be adjusted slightly on the computer. Get it as close to the original as you can.
- One of the most common problems is the painting looking a bit flat in the photographs. If this is the case, increase the contrast setting just a tiny bit and see if it makes a difference.
- You may need to rotate the image to get it the right way up and square to the frame of the camera
- Crop out any background and if you have had to place a tiny bit of tape on the painting get it to stay on a board for photographing, you will need to crop that out too. This is why it is very important to make sure the tape covers as little of the painting as possible. Ideally, it should not take up more than the overlay of a mount edge.
- If you are taking the photographs for an online exhibition, check their guidelines and rules for specific image requirements.

- Sometimes there’s a little nudge on the camera when you click the phone button. There’s an easy way to deal with this. If possible set your camera up on a tripod. Even a small Gorillapod on a table will work. Then get yourself a Bluetooth remote shutter control for your camera. These cost the same as a few cups of coffee but you will find it delivers far more value. Once you have everything set up, you can use the remote button to take the photograph without the risk of slight movement creating a blur.
Get great photographs on a budget
A professional photoshoot would be wonderful if we all had the funds. At the next level, you could kit yourself out with a DSLR, tripod, lights and more – and have a steep learning curve to negotiate. However, if you follow these basic rules, you can produce good quality photographs of your paintings for social media and for online exhibitions.
If you’d like to receive a regular art boost in your inbox, with ideas and inspirations for artists – signup here and we’ll get started with a collection of beautiful professionally designed printable quotes for your inspiration board.
Note: the links to products in this post are affiliate links which means that if you use those links to buy any of these items, I may eventually get enough from Amazon to buy a cup of coffee. I have included them for you, simply because these are the items I use.